FAQ | Making the Most of Getting Ready Photos

I think we can all agree that planning a wedding takes a lot of time, a lot of brain power and a lot of organization. Am I right? So many of my couples ask me for advice or tips to make their wedding day run more smoothly so they can get the most out of their photography investment, plus enjoy their day and their new marriage (Amen to that last point!). I think everyone planning a wedding can benefit from some tips and tricks, so here we go … Let's talk about the beginning of the wedding day. After the ceremony and reception details are set in stone, it's easy to want to be done planning. And understandably so. But if you've hired a photographer to capture some of the "getting ready" process, it's worth spending a little extra time thinking about where you'll be getting ready and how that process will take place.

As a natural light, film-shooting, detail-loving photographer, I actually really enjoy photographing this part of the day. The pace is a little slower, I get to catch up with the bride (and groom if he's opted for getting ready photos, as well) and meet her family and bridesmaids, I get to be creative and try new things, and overall get a grasp on how the day will go. The following are my very best tips and tricks for getting those gorgeous, airy, light-drenched getting ready photos that you always see on Style Me Pretty. :)

Film Wedding Photography

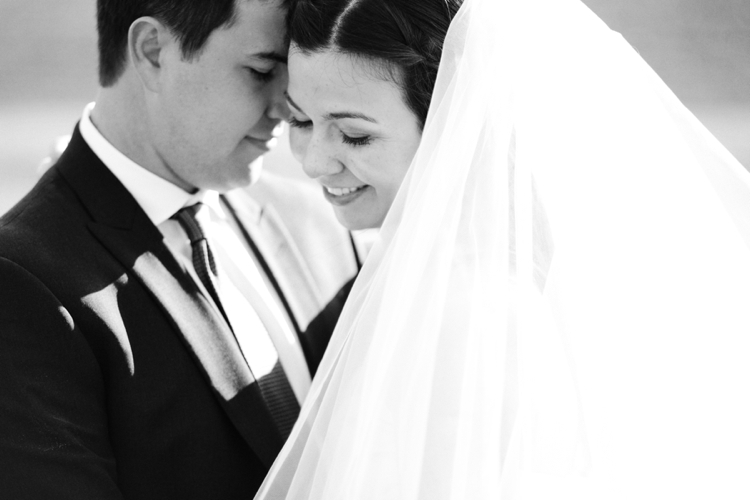
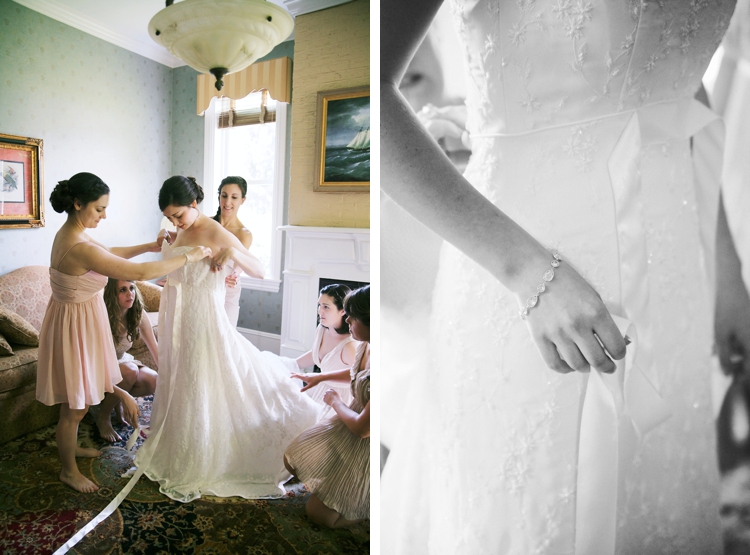
1) Let there be light! That photo up there was taken on film, and that was only possible because there was a ton of natural light flooding into the room (from that window you see to the right of the photo). I adore natural light and will only pull out my flash + light stand when I absolutely have to (i.e., dark reception rooms). Besides the fact that there's usually not a ton of extra space during the getting getting process (making it hard to set up a big light stand), I believe that natural light is more flattering and dreamy and suits this process so much better than artificial light.

In the same vein, I generally turn off overhead lights and floor lamps when I'm photographing. The artificial light gives off a yellow tint that can mess with the camera's white balance, especially if you're also using another light source—windows!

When thinking about where you'll be getting ready on your big day (a hotel, your parent's house, the church), double check the lighting situation. It's ideal to have at least one big window + white or light walls, ceiling and/or floor. All of those light-colored pieces combine to give me lots of natural reflectors, perfect for airy and bright photos. Make sure you're camped near that window for makeup and hair, and then plan to have it all cleaned up in time for you to get your dress on. The same goes for the groom. I'll always put you in front of a window to get ready.

Tips for Getting Ready on a Wedding Day_0002

2) Speaking of cleaning up … I know, I know, this seems like a ridiculous request. I can hear what you're thinking: We're cramming 10-12 people—each with bags of stuff—into a small space and you expect it to be clean?? I definitely don't imagine you and your friends leisurely getting ready in a spotless, light-filled room all morning, but it is nice to designate one space for stuff so that it's easy to move out of the way when needed. Or, if you have the option, designate a room (that dark one that I won't want to use for photos anyways!) for every thing to live until everyone's ready. I have been known to go on a cleaning spree when I arrive for getting ready photos … which I'm fine with as long as you are! :)

Tips for Getting Ready on a Wedding Day_0003

3) It's the small things. Part of being a wedding photographer means that you capture the big and small pieces of a wedding day, and boy do I love the small things. Telling the story, for me, includes a photo of your grandmother's pin that will be tucked into your dress and the inscription on the inside of his ring. These little things (along with the dress and shoes and invitations) sit in between the big moments of your day and give your wedding even more meaning.

We will talk about these things when we're working on your timeline so I make sure I don't miss anything. That said, be prepared for me to ask for said things when I arrive. I don't expect you to have every detail packaged perfectly in a box labeled "Photographer" (although if that helps you get organized, by all means go for it!), but I will take whatever you give me and go find the best light and background against which to photograph the details. This means that I will ask to move your dress from it's spot against the closet door to a more open, light-filled space (see how #1 and #2 tie in to this third point!). I might even ask to take it outside if that matches the look and feel of your wedding. The same goes for shoes, rings, stationery, handkerchiefs, ties, watches, etc. I promise, I'm really, really careful, and I usually have a second shooter to help me keep everything clean and tidy.

Wedding Day Details

4) Keep it consistent. From a photographer's point of view, it's ideal for the couple to get ready at (or very near) the same location (in different spaces, of course!) if both halves want getting ready photos. I know this doesn't always work out (and that's OK!), however, if you have the option to make this happen … take it! It's challenging for one photographer (if you've opted to just have me shoot your wedding) to get to two entirely different places across town, photograph the process, and get back to the original place in a reasonable amount of time. If you've opted for two photographers it's a little bit easier, but because we drive one car on the wedding day we have to coordinate schedules and make sure we pad the driving time (accounting for possible traffic and road construction) so one of us doesn't get stranded! We're all about maximizing photo time here—and the hours you're paying us to document your big day—so we want to limit driving time and use our cameras as much as possible.

Pinecroft at Crosley Estate Wedding

5) Maximize your time. Speaking of making the most of your photography, remember that we don't have to be with you for the entire getting ready process. Most brides don't want 15 photos of themselves with curlers in their hair, so plan to have us arrive 1-1.5 hours before you walk out the door to the first look or ceremony (maybe a bit longer if both the bride and groom want photos). It's nice for me to have a dedicated amount of time to capture the details without feeling rushed plus get the finishing touches of your hair and makeup.

Note: Variations to that schedule might arise during our timeline planning if you're getting ready in multiple locations (i.e., salon + house), fitting in bridesmaids/groomsmen photos before the ceremony, or driving a particularly long ways to the first look or ceremony. The absolute BEST way to maximize your photography time (plus ensure that your wedding album is aesthetically consistent) is to plan for everything to happen at the same venue (getting ready, ceremony, portraits, reception).

Cleveland Lifestyle Wedding Photographer

I should reiterate that this is the advice I give the couples I, personally, work with. It is by no means the only way to do things. If you are working with another photographer, they might have different ideas and best practices, and it's always worthwhile to ask questions.

FAQ: Getting the Most out of Family Formals

I get a lot of questions about family formals, and rightly so. If I hadn't worked with a wedding photographer before I got married, I wouldn't have even known what "family formal" meant. Basically, family formals are the posed family photos that take place right before or after a wedding ceremony. Downtown Cleveland Ohio Wedding

For the record, I want to point out that I am not a "pose-y" or traditional photographer. If a bride or groom is looking for these formal photographs throughout their wedding day then I am not the right photographer for them. I reserve a specific time for family formal photos, which have been meticulously planned for that specific time, and otherwise I'm shooting interactive portraits or as a fly on the wall.

That being said, I do think traditional family photos are important. I understand that grandma might not want to hang a candid shot on her wall or that this might be the first time your entire family has been in one place all together since 2004. I know I cherish the family photos we have from our wedding.

So, let's talk about how to make the family formal experience run smoothly and a good time for all:

  1. Tell the applicable family members ahead of time that they should stay after the ceremony (or come before the ceremony if you're doing a first look) for photos. When you're coordinating so many people, someone is bound to be missed. Despite best efforts, it never seems to fail that someone on the family formal list leaves for the reception, either forgetting they were supposed to stay or never having been told. Send your family members a quick e-mail a couple weeks out to let them know that you'd love a photo with them before or after the ceremony.

Backyard Cleveland Ohio Wedding

  1. Designate a family member to help round people up during photos. I have a planned list of photos that my assistant uses to get people lined up, but it always makes things go faster if a family member who knows most of the people on the list helps get them on deck. We don't necessarily know who Aunt Sally and Uncle Jim are, but a cousin can pull them out of the crowd.

Akron Country Club Wedding

  1. Plan for a manageable number of photos. Look, I totally get that this is the one time everyone is together and you want to take advantage of that with lots of photo combinations, HOWEVER, it won't be a pleasant experience for anyone if you have 53 different groupings to get through. :) A couple months before a wedding, I send the bride and groom a list of family formal photo ideas. The list is long. I don't expect them to check every, single one. Ten to 12 different combinations is generally very manageable and can be done in 20 minutes if the groups don't include 50 people each. If a couple wants more photos than that but we don't have the time for it, we'll do a few more photos at the reception. Win-win!

Rustic Cincinnati Ohio Wedding

  1. Think about the lighting. If you have the option to take family formals outside, DO IT! I would choose natural light, bright photos over the light of a shadowy, dark church any day (notice all the photos in the blog post were taken in natural light). So if you and your family are OK with being a little untraditional, plan to move outside for photo time.

Club at Hillbrook Cleveland Wedding

FAQ: Workin' the Workflow

I think one of the hardest things about being a wedding photographer is managing all the work you're left with post-wedding. It's easy to assume that wedding photographers are taking pictures most of the time, but really, it's the opposite. I might shoot one wedding and two sessions in a week (for a total of 13-ish hours), but then I'll spend 35-40 hours editing, blogging, e-mailing and doing admin stuff. Last wedding season, I had 12 weddings and I worked another job, so it was a little tricky finding time to get everything done. I did relatively OK getting everything turned around (my goal was always four weeks), but I just felt frazzled and unorganized ALL THE TIME.

This year, I'm hoping that change that, plus turn photos around in two weeks! I've been brainstorming all slow season on the best workflow to make this all happen, while keeping my sanity, and I wanted to share it with you all!

Workflow

That up there is how I want my days to go come busy season. Here's the breakdown of what I have to get done from the time a wedding ends to when I post the full blog of that wedding:

  • Cull all photos (I do this in Aperture and use a star system to keep everything organized. Five stars mean the photos make the full blog post, three means they make the best-of-day edit but not necessarily the blog, and one means they make the digital negatives disc).
  • Export original files to a folder on my hard drive.
  • Back up originals on my external hard drive and my cloud.
  • Edit a few favorite photos for a sneak peek wedding blog.
  • Edit all photos in Aperture (My editing in Aperture consists of putting a preset on all photos and fixing the exposure, contrast, white balance, and colors on each. It sounds like a lot, but Aperture allows you to batch process, so if I do an edit that I like on one portrait, I can generally copy that exact edit to all other similar photos. It saves SO much time).
  • Export all edited photos to a folder on my hard drive.
  • Do a light edit in Photoshop for those photos that need it (My editing in Photoshop consists ONLY of touching up skin and popping eyes a tad. Photoshop can get cumbersome, so I do as much as I can in Aperture).
  • Back up all edited photos on my external hard drive and my cloud.
  • Upload all edited photos to a client gallery.
  • Burn photos to discs, wrap client gift, write thank-you card, package everything and mail it.
  • Create a full blog post (this consists of getting my photos blog-ready via Blog Stomp, reviewing my client's "Get to Know You" form so I can write the intro text, putting together a vendor list, and creating a slideshow).
  • Submit wedding for publication, if applicable.
  • Delete photos from Aperture.

Whew. I'm tired just looking at all of that. I really have tried to hone my workflow to just the essentials, and while I'm sure there will continue to be tweaks here and there, I really think all that stuff is essential for MY business. I totally understand that it doesn't work for everyone!

So, I knew that I wanted to get all those bullets up there into a two-week timeframe, and I have played with so many calendars until I reached a process that I think just might work!

Saturday #1: Shoot wedding #1. Sunday #1: OFF (It's reallllly important for me to have time off during the week or I get burned out. And this way, I can spend time with Nathan since we usually don't see each other on Saturdays [his other day off]). Monday #1: Cull wedding #1 (All of it! No exceptions). Edit a few favorite photos. Tuesday #1: Post a sneak peek blog of wedding #1. Spend the rest of the day doing business-related stuff that usually gets lost in the busy-season shuffle. Wednesday #1: Edit all photos from wedding #1 in Aperture. Thursday #1: Edit all photos from wedding #1 in Photoshop. Friday #1: Do business-related stuff or edit a portrait session if I have any. Saturday #2: Shoot wedding #2. Sunday #2: OFF. Monday #2: Cull wedding #2. Edit a few favorite photos. Tuesday #2: Post a sneak peek blog of wedding #2. Upload photos from wedding #1 to client gallery, put together the package and mail it, and schedule a full blog post (all for wedding #1). NOTE: Scheduling the blog post ahead of time is huge for me. This way I'm not scrambling to get it done the day it's scheduled to go live. Wednesday #2: Edit all photos from wedding #2 in Aperture. Thursday #2: Post full blog of wedding #1 (remember that I scheduled it, so I don't really have to do anything here). Edit all photos from wedding #2 in Photoshop. Friday #2: Submit wedding #1 for publication, if applicable. Do business-related stuff or edit a portrait session if I have any.

And the process continues to repeat itself. I do make sure to leave one weekend open a month so that I can have a mental break and actually spend a whole weekend with Nathan. With him working a M-F job, we have opposite schedules and tend to be like ships in the night during the summer.

I know this was suuuuper long, but I hope it helped at least one person! Feel free to e-mail me questions at lane@lanebaldwinphotography.com. I'd love to help in any way I can.